I love this CTMH blog post & wanted to share it with you. 🙂
“Looking for a way to spice up your scrapbook pages? We’ve got just the thing! All you need is a Cricut® machine and a little imagination for this technique.

First, find a basic Cricut® shape that you like: square, heart, diamond, etc. Next, cut out the shape over and over again on a piece of solid cardstock (we recommend using Cricut Design Space™ so you can more easily control where the shapes cut). Remove the shapes from the piece of cardstock, and then back the empty spaces with different pieces of patterned paper. As you can see from the example above, we repeated paper patterns across the shapes to add a sense of continuity to the page.
If you don’t have Cricut Design Space™, you can still get this effect by cutting multiple versions of the same image, but you could also cut the shapes out of patterned paper and attach them to a piece of cardstock. There are lots of different spins on this technique!
For example…
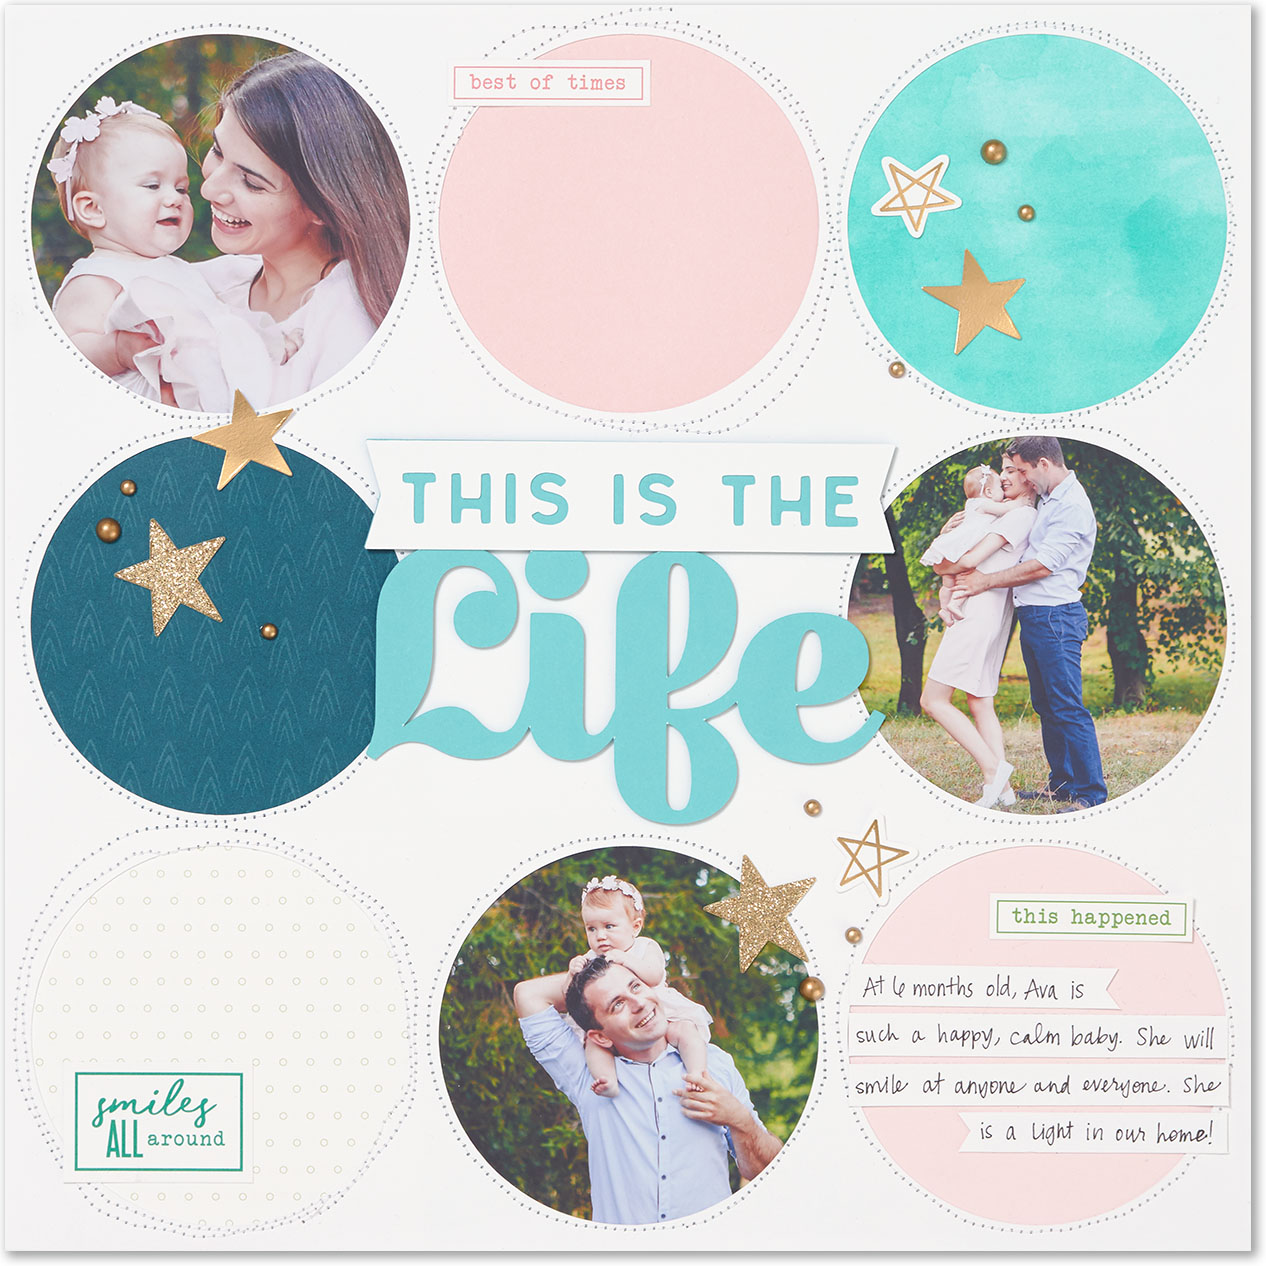
…try backing the shapes with photos! It’s a lot easier than trying to cut your photos on a Cricut® machine because you can slide them around behind the cardstock until they are framed just the way you like.
Another spin on this technique is to change up the size of your shapes. Smaller shapes give you a lot more little shape windows to work with. This page also shows how much you can play around with dimension as well.
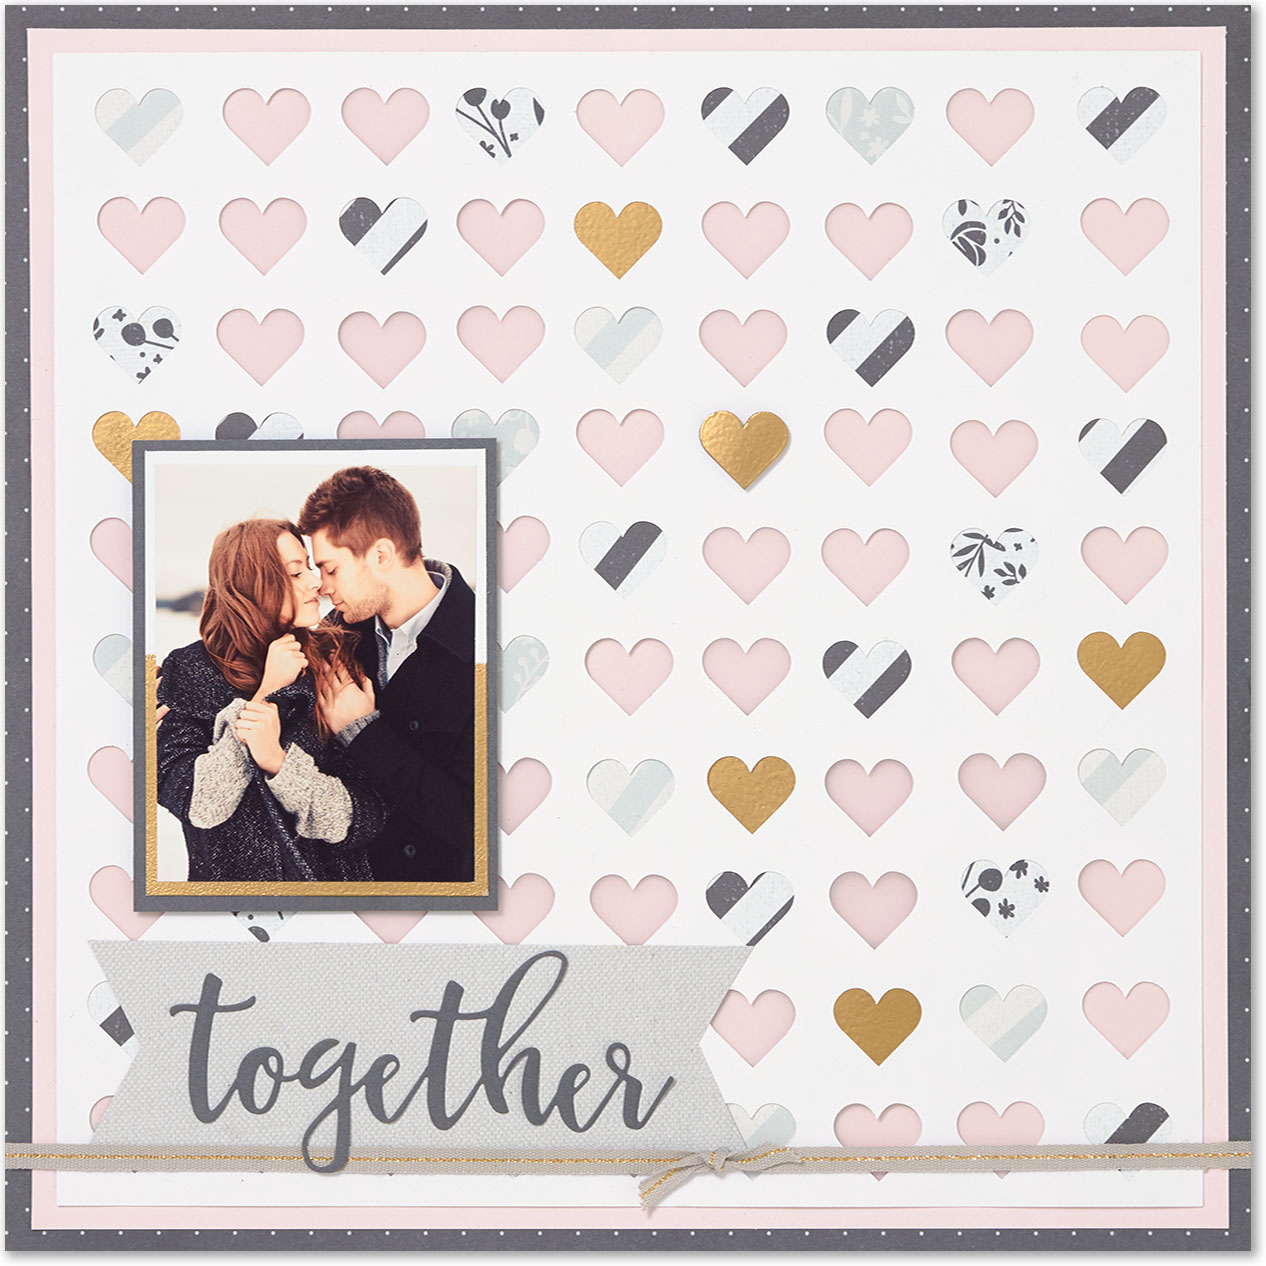
First, we backed some of the empty spaces with patterned paper and left others empty. Next, we used 3-D foam tape to attach the White Daisy cardstock piece with all of our heart shapes cut out of it. The Bashful background shows through the empty hearts and creates a bit of a shadow. To finish off the look, we took some of the hearts that were cut out and embossed them with gold powder. We then used them to “fill in” a few of the heart-shaped windows with more 3-D foam tape to make them really pop. See how many possibilities there are when you start playing around with your Cricut® shapes?”
For the entire Make It from Your Heart post & recipes, click here

